Coordinate Measuring Machines (CMMs) As Quality Control Tool in Precision Machining
As every electronic contractor manufacturer can attest, stay true to customer’s designs and specifications is essential in today’s highly competitive contract manufacturing arena.
In the world of contract manufacturing, being able to measure precisely and reliably is essential to quality manufacturing process control. Coordinate measuring machines (CMMs) offer one of the most effective ways to establish and administer rigorous quality control.
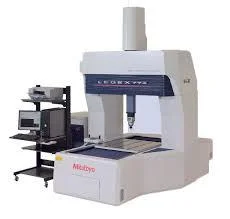
Major Components of a CMM
The Base:
A heavy base plate or table which serves as the foundation for an object placed on it to be measured. This is often a massive slab of granite or some other dense material that is stable, rigid, immune to fluctuations caused by the environment, and ground with a very flat top face.
Moveable Bridge or Gantry:
To the base table is mounted a moveable bridge or gantry. Vertical posts support a horizontal beam, and on this beam will be suspended another vertical column that holds the measuring probe. The bridge or gantry is able to move along the X-axis. The vertical spindle can move along the bridge thus defining the Y-axis.
The Probe:
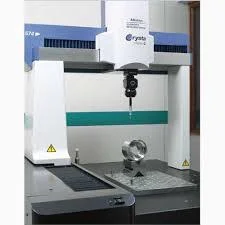
The probe on the vertical column can move up and down which defines the Z-axis over the table.
How Does a CMM Work?
CMMs measure work piece dimensions by moving the probe to measure the work piece. The precise position of the contact is recorded as an XYZ coordinate and is stored by the measuring system. Using these data points, the CMM's software calculates the desired distance measurements, geometric shapes, and the relative position of geometric shapes. The tip of the probe communicates its information to a computer which interprets the data with specialized software to create a 3D map of the part in question from the cumulative set of points.
There are two main types of probes:
- Touch probes are the most common probe type and also the least expensive. Contact-type probes actually touch the surface of the workpiece. Upon contact, a signal containing the coordinates of that point is sent to the CMM. The probe is then backed off and moved to the next location where the process is repeated. Touch trigger probes are the most common type of probe used on CMMs today.
- Noncontact probes are used in the same manner as touch trigger probes. However, with noncontact probes, a beam of (laser) light operating as an optical switch contacts the work piece. They do not touch the object, and therefore present no threat to the damage of the object being probed. However, they tend to be more costly.
The key benefit of a CMM
Compared to other measurement system, a CMM has the ability to quickly and accurately capture and evaluate dimensional data, providing the operator meaningful information concerning the condition of the manufacturing process. Ultimately, reliable measurements of complex shapes and surfaces rely upon a combination of tools and techniques, each one of which is optimized for a specific application.
A quality sheet metal and precision machining manufacturer, with the aid of advanced tools such as a CMM, can insure that every part manufactured meets and exceeds customers’ exact requirements.


